 Shopping Guide


)
![[Healthy Food for the Geeky Soul] Perfect Scrambled Eggs with Rilakkuma](https://resize.cdn.otakumode.com/ex/30.42/u/eade7b46b9bc4793a18a8b8b3f5573b8.jpg)
Recently, I’ve gotten Jamie Oliver-ed. I’ve been watching his food channels and I think I got sucked in, just a little. According to one of his posts, there are 3 ways of making scrambled eggs: -English way, French way and the American way. I grew up with an Asian mother whose scrambled eggs look nothing like Jamie Oliver’s. I love Asian food, but when it comes to eggs, I think I prefer Jamie’s (sorry mum). This recipe today was inspired by Jamie Oliver and I hope you like it!
Since his “American Scrambled Eggs” looked the tastiest for me, I decided to “Yukinate” this recipe to look more suitable for Yukitchen. And it was, SO GOOD! I’m so grateful for Jamie Oliver who introduced western cooking via youtube. He’ll surely be going into my speech for a Thanksgiving night this year!
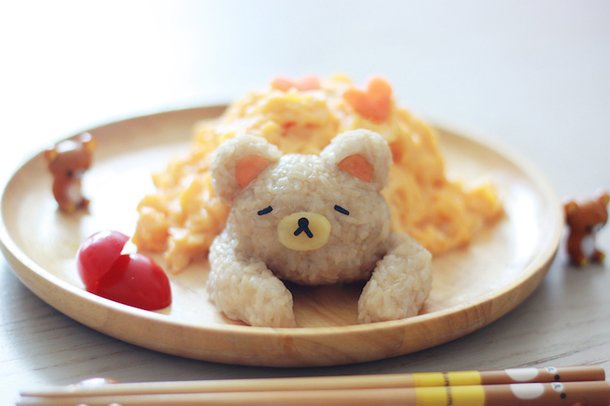
Instead of a slice of toast, I used soy sauce flavored rice balls, shaped like Rilakkuma. I wanted to make it look like he’s cozy in his blanket, and I think he really does look cozy :)
Personally I really like the feet.
This looks complicated but it really isn’t. This is one the easiest food art recipes I have worked on so far and I’d recommend all of you to cook this for a special meal this week :) It will make you smile for a very long time, I promise!
INGREDIENTS
For Rilakkuma
・1 cup rice
・2 cups water (to cook rice)
・1 tbsp soy sauce
・1 sheet dried seaweed ("Nori" in Japanese)
・a slice of carrot
・a slice of cheese (I used gouda this time)
For the Scrambled Eggs
・3 eggs
・a pinch of salt
・1 tbsp butter
・Black pepper, to garnish
INSTRUCTIONS
1: Cook rice in Rilakkuma brown. Add a table spoon of soy sauce before cooking. It will give you a perfect color for Rilakkuma’s brownness. I used a pot this time but you can use a steamer as instead. 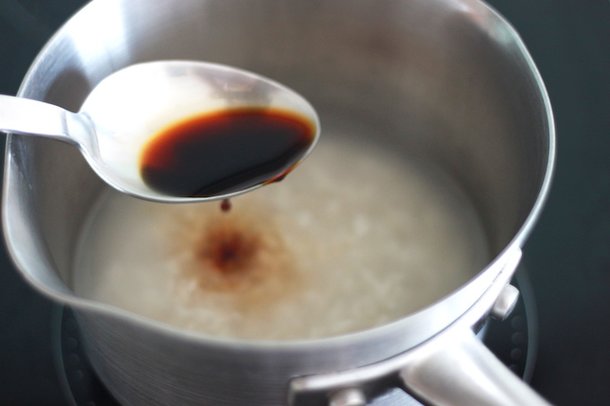
2: Create the facial parts. While waiting for the rice to be cooked, start working on making Rilakkuma’s face.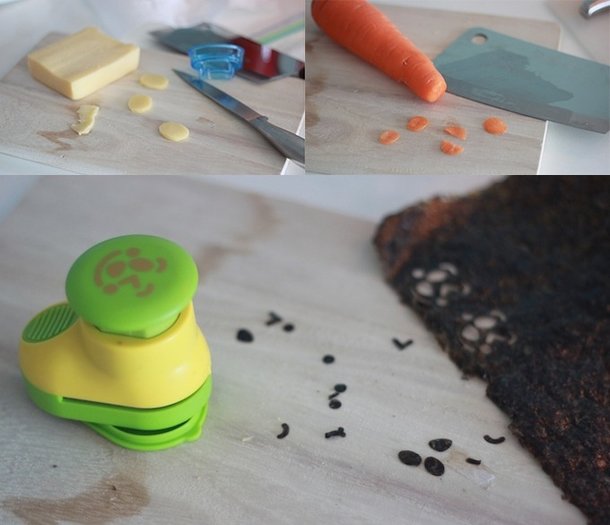
Mouth: Cut a thin slice of cheese (I used gouda this time), then make a round shape with knife, or a cookie cutter. I used both!
Ears: Cut a thin slice of carrot and make 2 semicircle shapes.
Eyes and lips: I used a seaweed puncher but you can also use scissors.
3: Check the color of cooked rice. When the rice is cooked, it looks something like this. If you’d like it more brown, add a bit more soy sauce and mix well.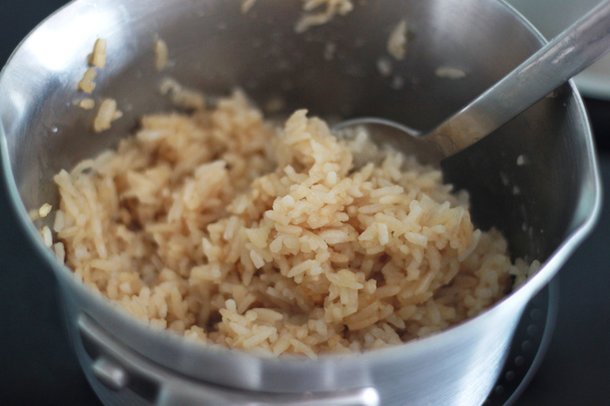
4: Use a plastic wrap to make rice balls. Your rice balls will be so much tighter using a plastic wrap than using your own hands. Simple Asian trick ;)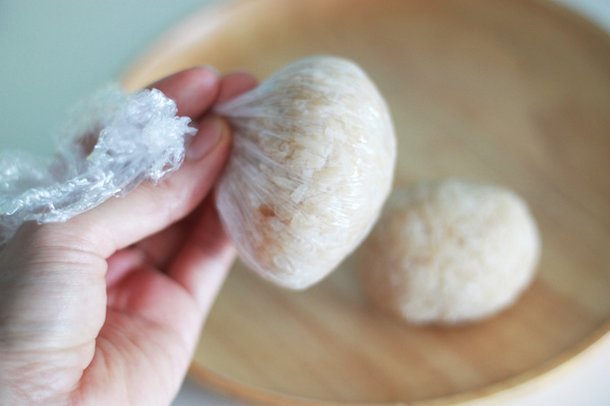
5: Build the Rlakkuma body parts. Put the body, limbs and ears all together. It will then look something like this. It’s getting so exciting!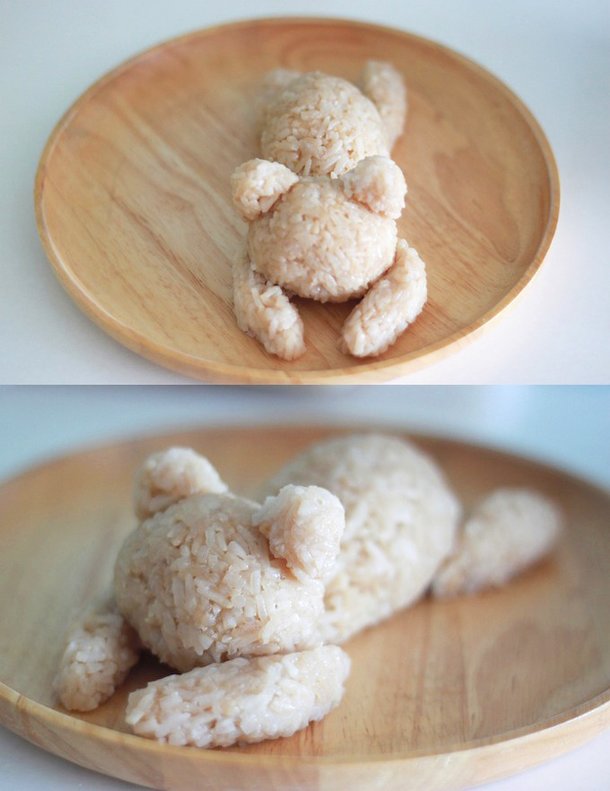
6: Add the facial parts on Rilakkuma’s face. This is my favorite part! Grab the parts you made earlier and enjoy being a bear-artist for a while. I made a sleepy face but it’s up to you what kind of face you want for your Rilakkuma :)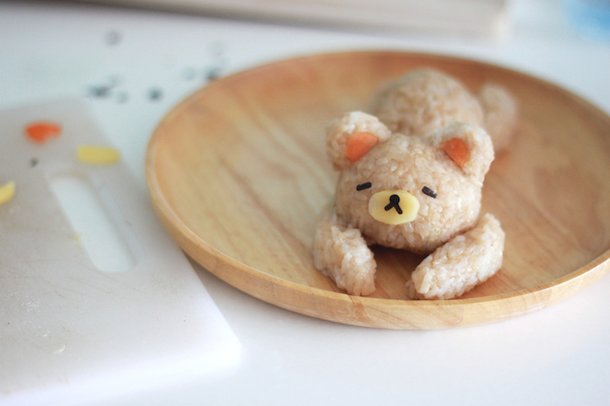
7: Retouch the shape with a plastic wrap. Another trick! It’s better to use a wrap when you retouch, rather than accidentally using your dry hands that will cause a major disaster.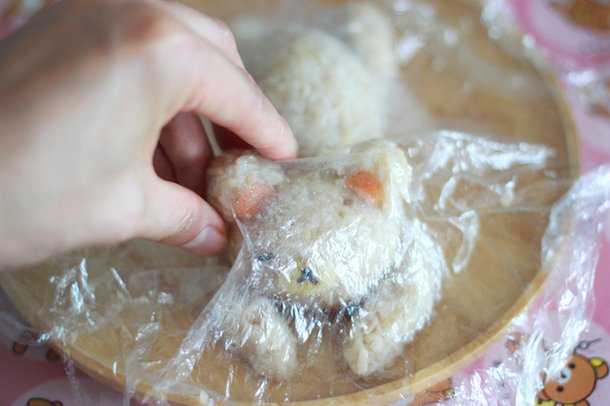
Voilà! You’ve made a sleeping Rilakkuma. Poor tired little bear. Don’t worry, I’m about to give you a nice warm blanket soon. An egg blanket ;)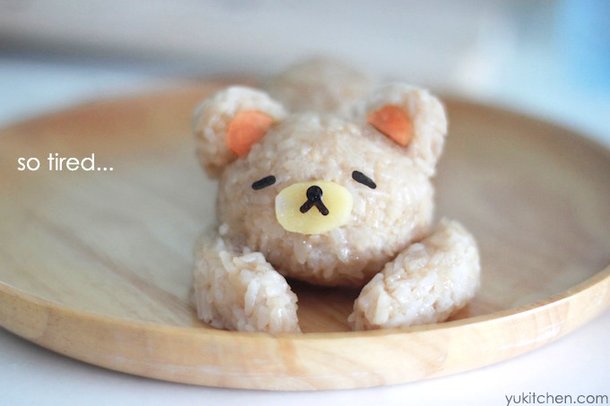
8: Time for the eggs. Beat the eggs well and add a pinch of salt and mix again.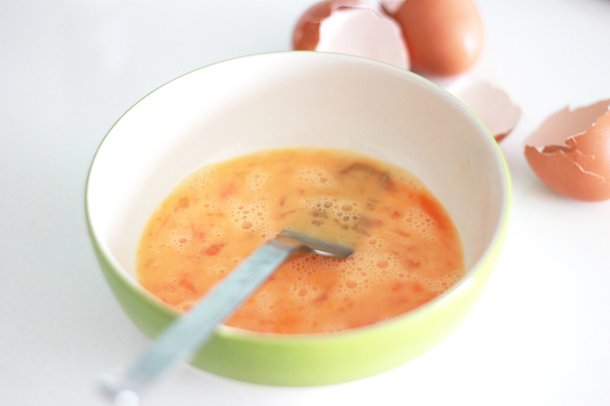
9: Low-heat the pan, WAIT, then cover it with butter and the eggs. (This is the most important part of making the best scrambled eggs!) Warm the pan with the lowest heat, and wait till you feel the heat on the pan surface. Drop a table spoon of butter and spread it on the pan. And again, WAIT till the butter becomes white-ish and bubbly. When you don’t wait and try to do it quick, your scrambled eggs will not be as fluffy as you want. Try to be patient for a while! I’m using a lot less butter than Jamie Oliver’s recipe, by the way. If you’re a butter person, go ahead and add more. I like just a hint of butter, it’s a personal preference.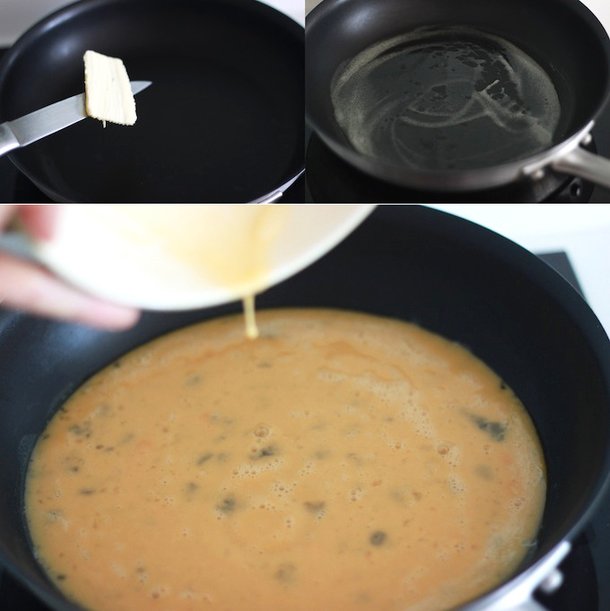
10: Wait till the eggs sit. When the eggs are ready for your first attention, the edges will look something like this and that means you can finally start working!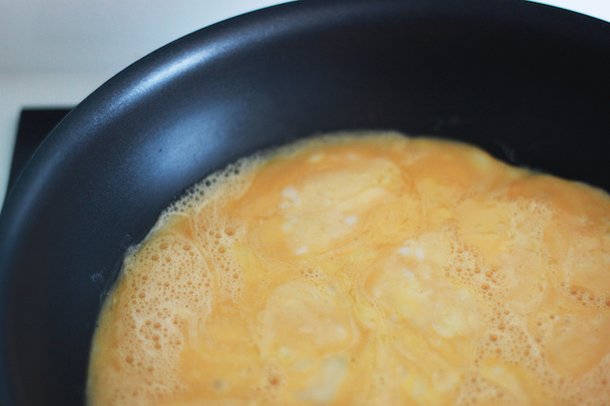
11: Slowly scrape the eggs to the center with a spatula. You are basically making beautiful egg sheets. Gather the solidifying sheets all to the center, then spread the liquid parts out on to the pan and wait until it’s time for the next scraping. Then spread the rest on the pan again and wait till the next scraping. You NEVER actually “scramble” your eggs. Don’t do that unless you are my mum. Today we want Jamie Eggs.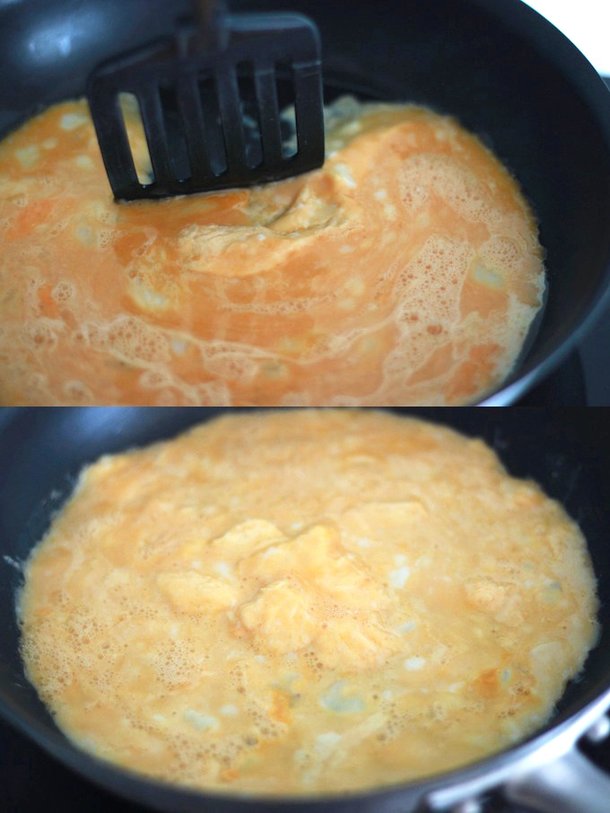
12: Keep doing the same until there’s no more left. I did 4~5 sessions with the lowest heat. It takes so much time but it’s worth it.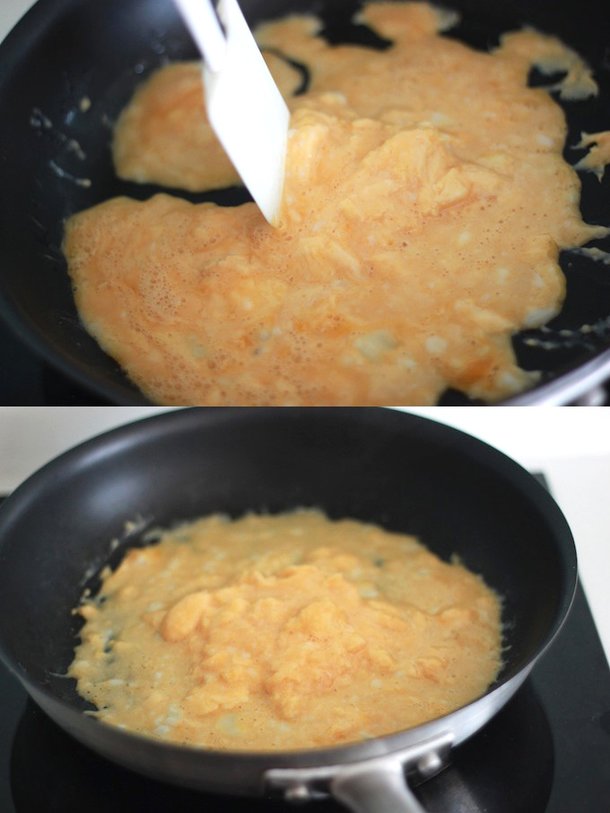
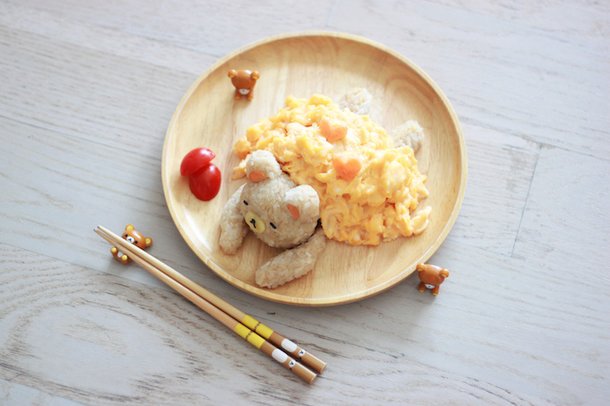
13: Pour the scrambled eggs on Rilakkuma, like a blanket. Make sure he looks like he’s sleeping comfortably with his fluffy blanket. Looks matter, people!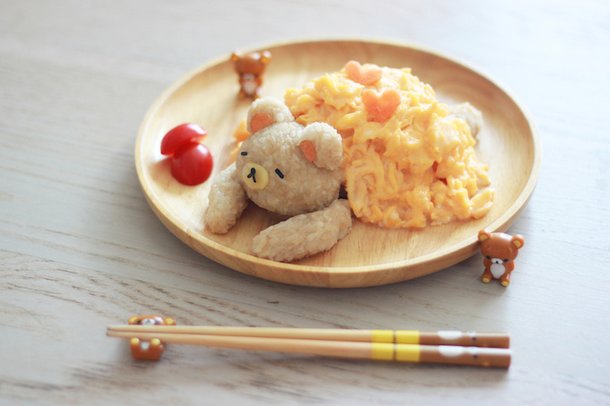
14:Garnish with black pepper, and you are done! The perfect scrambled eggs feat. Rilakkuma, at your service.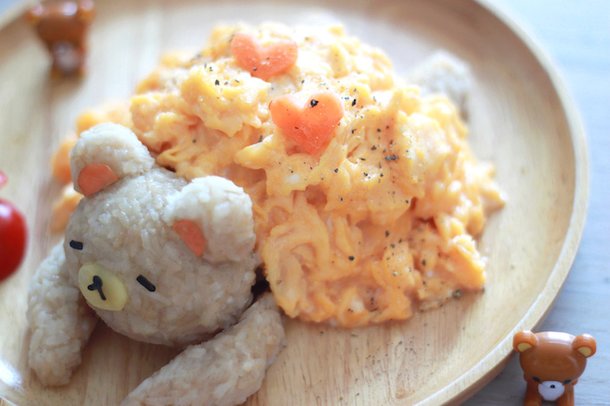
I added heart shaped carrots just for fun. This is such a girlie food but I love it <3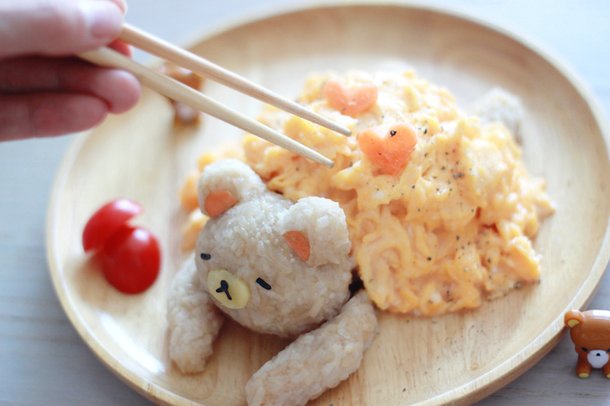
The perfectly fluffy scrambled eggs tasted… perfect!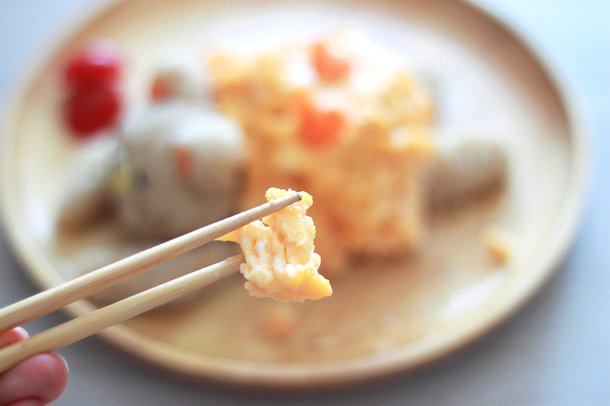
Note:
I used Thai rice for this cooking. Since Thai rice is not as sticky as Japanese rice, I added Thai glutinous rice (sticky rice) for 1/4 cup. so if the pictures of my rice balls look a bit stickier than usual, that’s probably why. If you have access to Japanese rice, you don’t need to add anything! :) (Japanese rice is simply the best!)
Happy happy cooking everyone! I hope you enjoy this food.
xoxo
-Yuki
This recipe was adapted with permission from Yukitchen.com.
You can learn more about Yuki and her awesome creations at her website, or follow her on Instagram and Facebook!
![[Healthy Food for the Geeky Soul] Perfect Scrambled Eggs with Rilakkuma 1](https://resize.cdn.otakumode.com/ex/30.30/u/cafc346a602f43efbeff141424e724c9.jpg)
![[Healthy Food for the Geeky Soul] Perfect Scrambled Eggs with Rilakkuma 2](https://resize.cdn.otakumode.com/ex/30.30/u/789a73fad13146f69bea28aa81033776.jpg)
![[Healthy Food for the Geeky Soul] Perfect Scrambled Eggs with Rilakkuma 3](https://resize.cdn.otakumode.com/ex/30.30/u/1ee10c9534954fdd98f634b6d6d9d88b.jpg)
![[Healthy Food for the Geeky Soul] Perfect Scrambled Eggs with Rilakkuma 4](https://resize.cdn.otakumode.com/ex/30.30/u/9f20dbdbdbba462fa2b6645748721b1c.jpg)
![[Healthy Food for the Geeky Soul] Perfect Scrambled Eggs with Rilakkuma 5](https://resize.cdn.otakumode.com/ex/30.30/u/49897b0d654644a8a80ea8f62a254bbc.jpg)
![[Healthy Food for the Geeky Soul] Perfect Scrambled Eggs with Rilakkuma 6](https://resize.cdn.otakumode.com/ex/30.30/u/66881b2998e74513b1f5b51062520d43.jpg)
![[Healthy Food for the Geeky Soul] Perfect Scrambled Eggs with Rilakkuma 7](https://resize.cdn.otakumode.com/ex/30.30/u/82fe35a5fc244f0aaf5f0f0dd6c84e25.jpg)
![[Healthy Food for the Geeky Soul] Perfect Scrambled Eggs with Rilakkuma 8](https://resize.cdn.otakumode.com/ex/30.30/u/ae51567697274e81800691d0b0b201f4.jpg)
![[Healthy Food for the Geeky Soul] Perfect Scrambled Eggs with Rilakkuma 9](https://resize.cdn.otakumode.com/ex/30.30/u/9f1ce50ff26c4a7693b7e64d0ce219e3.jpg)
![[Healthy Food for the Geeky Soul] Perfect Scrambled Eggs with Rilakkuma 10](https://resize.cdn.otakumode.com/ex/30.30/u/939849f752e540edb890b1ab5975ed72.jpg)
![[Healthy Food for the Geeky Soul] Perfect Scrambled Eggs with Rilakkuma 11](https://resize.cdn.otakumode.com/ex/30.30/u/c5423e10abe649c29d68ec20bf6fe248.jpg)
![[Healthy Food for the Geeky Soul] Perfect Scrambled Eggs with Rilakkuma 12](https://resize.cdn.otakumode.com/ex/30.30/u/8c7558560da44dbdb2473aa91e5453b6.jpg)
![[Healthy Food for the Geeky Soul] Perfect Scrambled Eggs with Rilakkuma 13](https://resize.cdn.otakumode.com/ex/30.30/u/6d8c27fa3b5d4719bfefe1e206b19cab.jpg)
![[Healthy Food for the Geeky Soul] Perfect Scrambled Eggs with Rilakkuma 14](https://resize.cdn.otakumode.com/ex/30.30/u/f70d112a2e754c3883915492d366d82a.jpg)
![[Healthy Food for the Geeky Soul] Perfect Scrambled Eggs with Rilakkuma 15](https://resize.cdn.otakumode.com/ex/30.30/u/6811cb784c3d4ceeb0db157fdb3b0b2f.jpg)
![[Healthy Food for the Geeky Soul] Perfect Scrambled Eggs with Rilakkuma 16](https://resize.cdn.otakumode.com/ex/30.30/u/c749e36915334c679f0a6902b1a3c6ae.jpg)
![[Healthy Food for the Geeky Soul] Perfect Scrambled Eggs with Rilakkuma 17](https://resize.cdn.otakumode.com/ex/30.30/u/d345ad21feeb478f92316e7f729d0cee.jpg)
![[Healthy Food for the Geeky Soul] Perfect Scrambled Eggs with Rilakkuma 18](https://resize.cdn.otakumode.com/ex/30.30/u/7b7d9a323b064c3abfde92c3fb113d68.jpg)
![[Healthy Food for the Geeky Soul] Perfect Scrambled Eggs with Rilakkuma 19](https://resize.cdn.otakumode.com/ex/30.30/u/94702998ed2c4a0ea3dfe7f8c7a436ea.jpg)
![[Healthy Food for the Geeky Soul] Perfect Scrambled Eggs with Rilakkuma 20](https://resize.cdn.otakumode.com/ex/30.30/u/d2fd607199284406a3f602b72373ed4b.jpg)
![[Healthy Food for the Geeky Soul] Perfect Scrambled Eggs with Rilakkuma 21](https://resize.cdn.otakumode.com/ex/30.30/u/fabfe91d4f6e419ca7fd2d9ccb60b3fb.jpg)