Hello there! I’m Tokyo Otaku Mode’s cameraman, Hara.
I’m in charge of product photography for TOM’s shop..
This may be sudden, but don’t you want to take incredible photos of your favorite figures?
Don’t you want to capture your love for them?
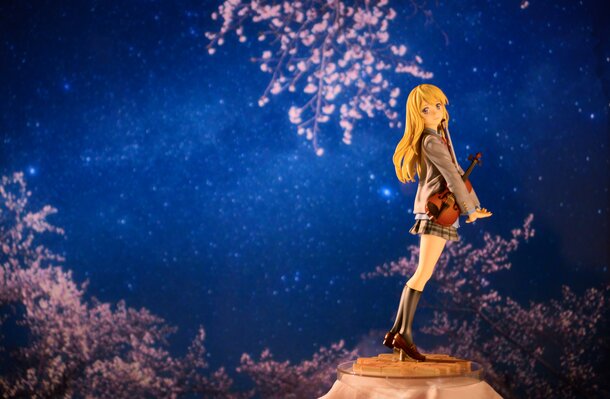
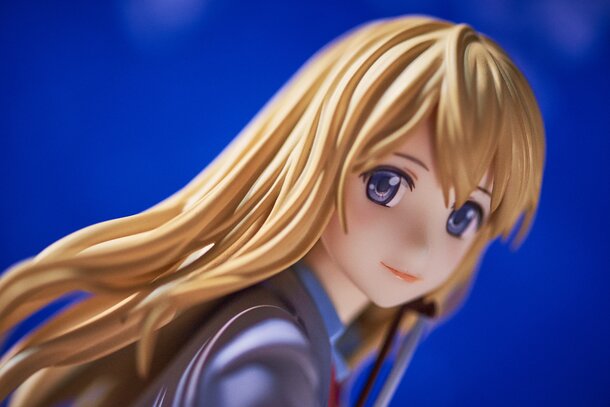
Actually, I took this ↑ photo of Kao-chan (*Shigatsu wa Kimi no Uso*).
I didn’t use any special equipment or difficult skills.
If you read this whole article, you’ll be able to take pictures just like this!
These are the only tools I used.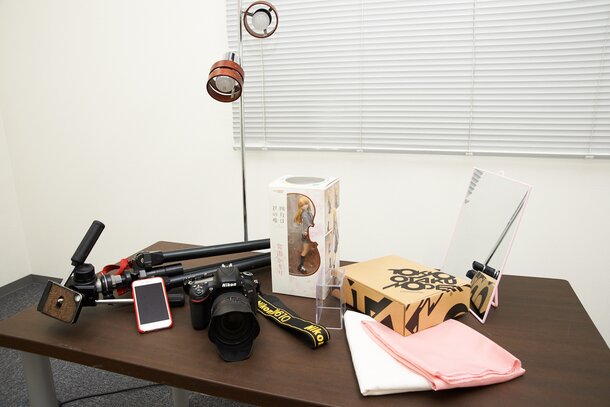
1. Why do People Take Photos of Figures?
Love.
2. First Up, Preparation
Cloth? Penholder? Mirror..? (I got these at a 100 yen shop)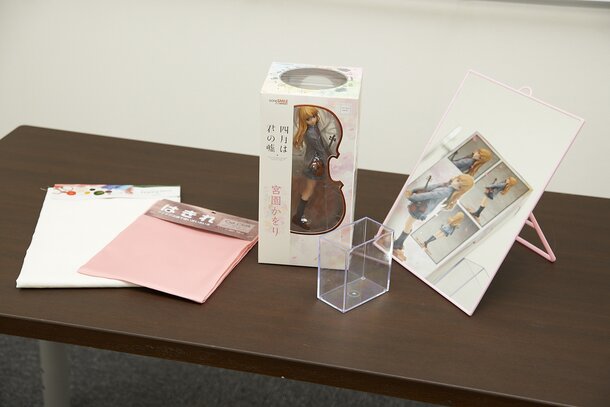
I’ll be using a Nikon D610, but the truth is, any camera will do.
That includes an iPhone. All you need is love.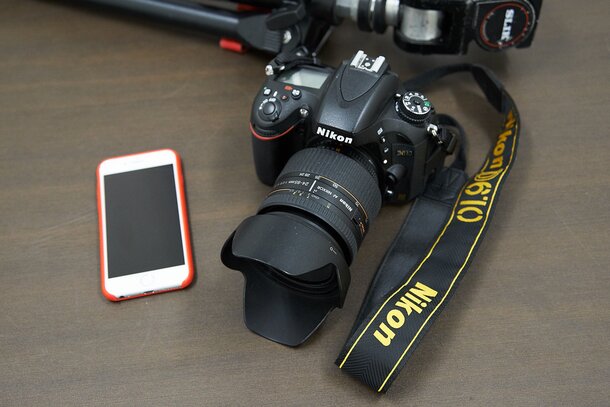
Indirect lighting...? You can find indirect mood lighting in your own home.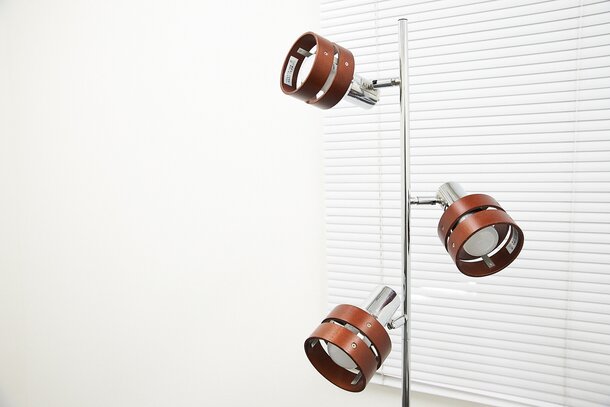
I’ll be getting help from my junior, Sou-kun. He’s around 2 meters all.
He can be scary when he’s angry, so I always try to gauge his mood when I talk to him.
I was worried this time, too, but when I asked him to help me take photos for the blog, he said ‘alright.’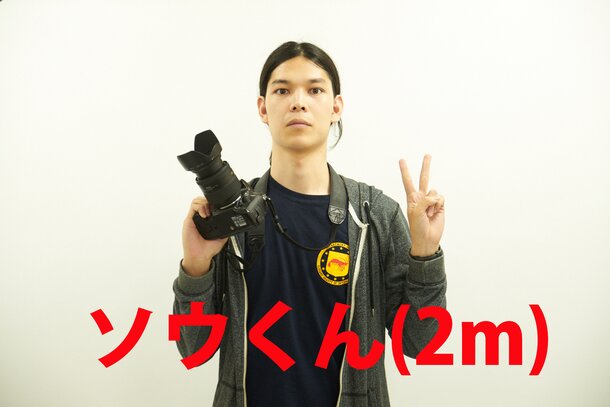
Opening Kao-chan’s box! My heart’s pounding!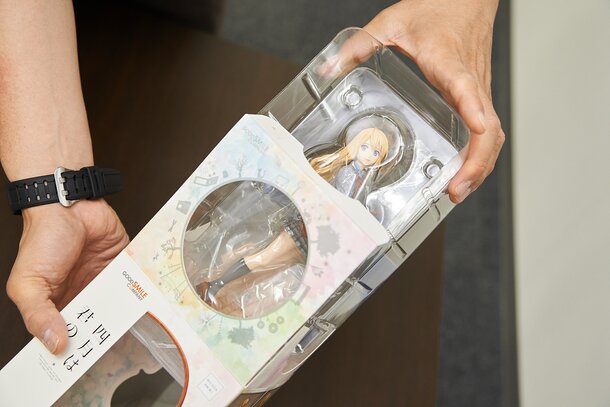
Staring at each other. A steady stare. This is the most important thing for photography.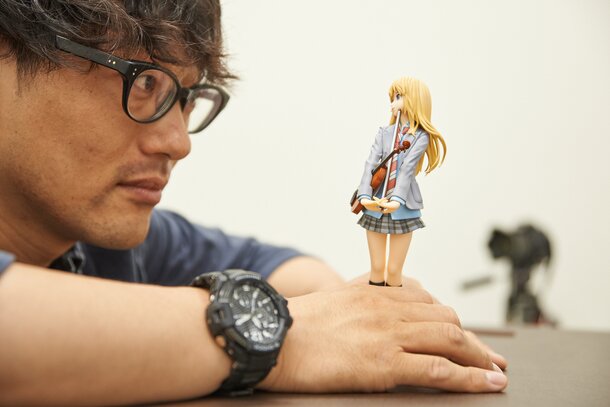
Then, without realizing it, I smiled! Sou-kun kept catching me smiling.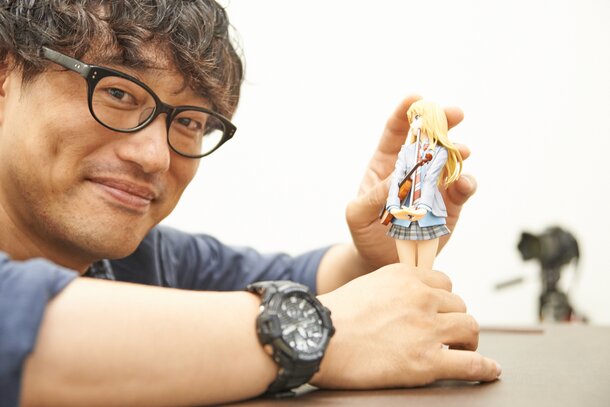
I started remembering different scenes and ended up crying.
“Kao-chaaaannnnn….”
Sou-kun said angrily (maybe just a bit), “Hara-san, please hurry up. I’m busy.”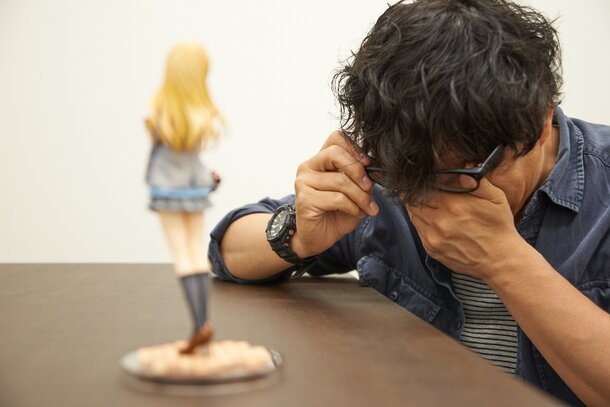
I couldn’t hear him. I was too caught up with Kao-chan.
3. Camera Settings and Lighting
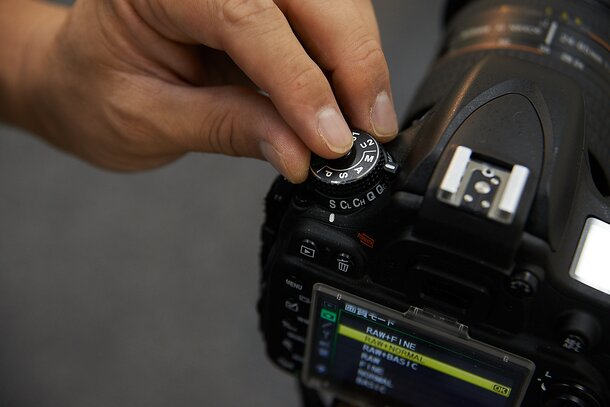
You don’t necessarily have to take photographs manually, but in this instance, I did.
Any settings for A (Aperture Priority Auto), S (Shutter Priority Auto), and P(Program Auto) is fine.
I took pictures as .RAW, but .jpeg works, too!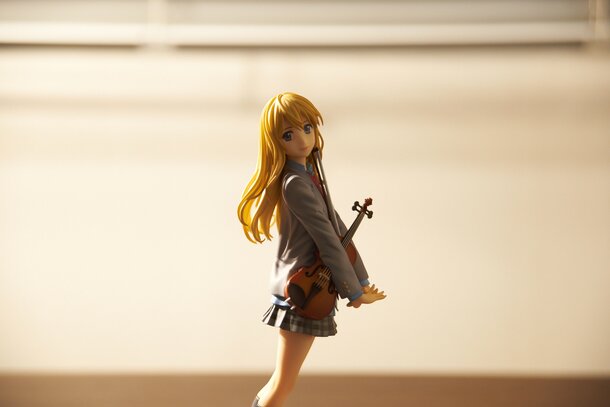
Next up is lighting. You don’t need special strobe lights. It’s fine to use indirect lighting or stand lights you can find at home! If the light comes from behind Kao-chan, it lights up her back and adds highlights to her hair.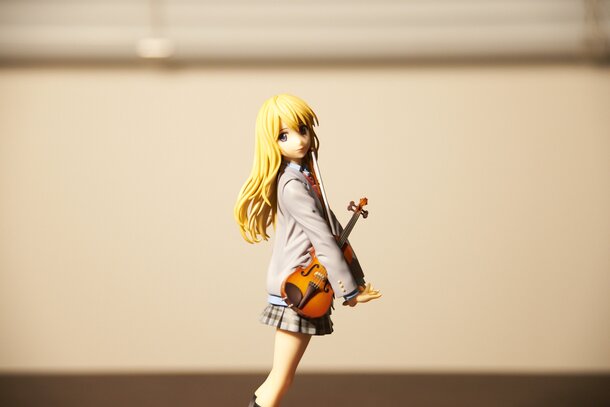
If it hits her from the front, it adds a natural look, and brightens her face. Lighting isn’t too hard - just watch how it behaves. Look with your own eyes and highlight what you think looks best. I chose to bring light in from behind her.
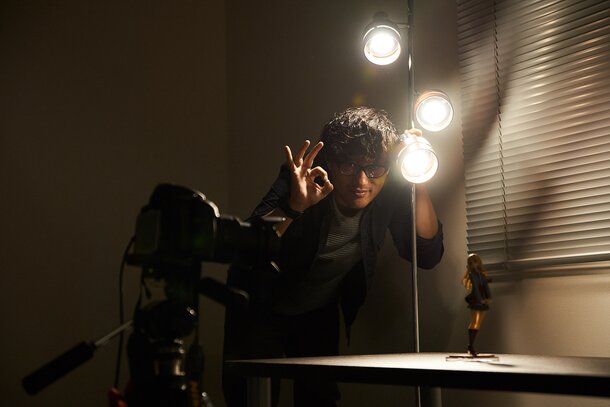
Since it’s coming in from the back, it adds a shadow to her face. When that happens, it’s time for the mirror.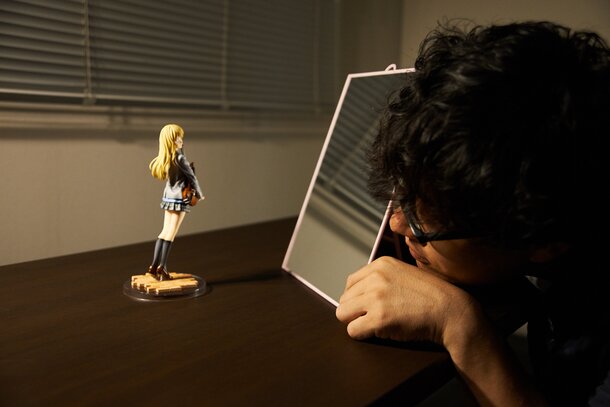
By reflecting light using the mirror, we can light up Kao-chan’s face. The way you reflect the light will change the overall scene, so play with the mirror’s placement and find what you think looks best. Some spots will make it shine. Other spots will soften it.
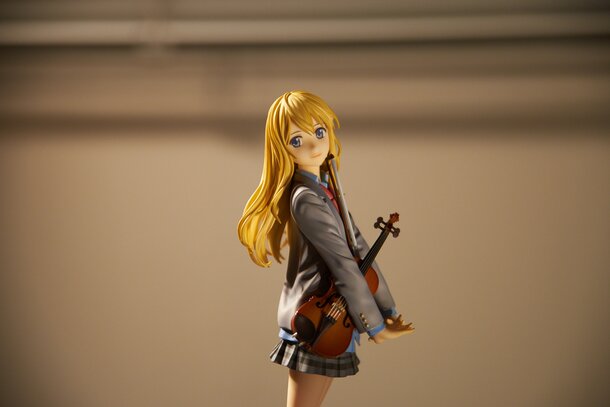
4. A Serious (and Genius) Pro
I had a hard time deciding on the background, so I took the easy way out - Google! Looking stuff up with Kao-chan. We searched for ‘Sakura Fair Use’.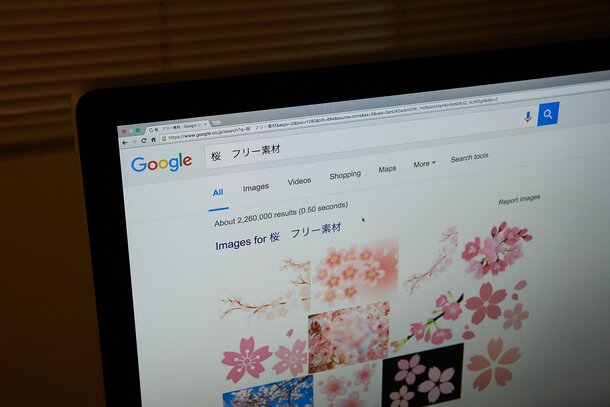
When you think ‘Shigatsu wa Kimi no Uso,’ you think cherry blossoms. If it’s Kao-chan, it’s cherry blossoms.I finally found a suitable background for her.
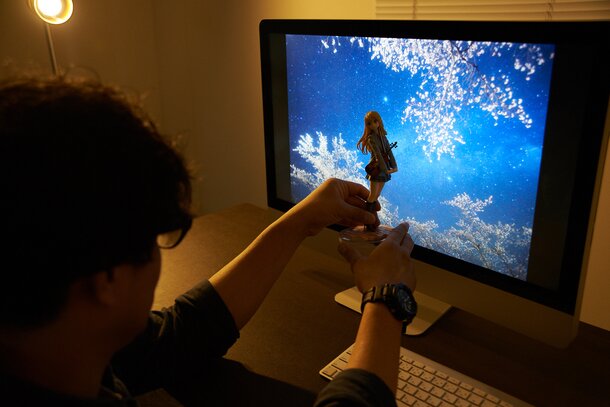
*Creator: Bellafaye Garden
I used the cloth to add height...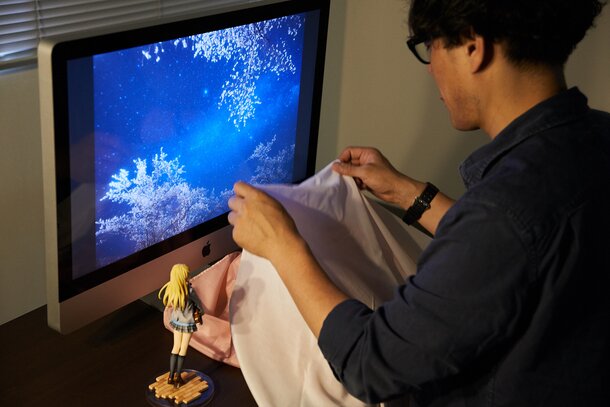
Adding light...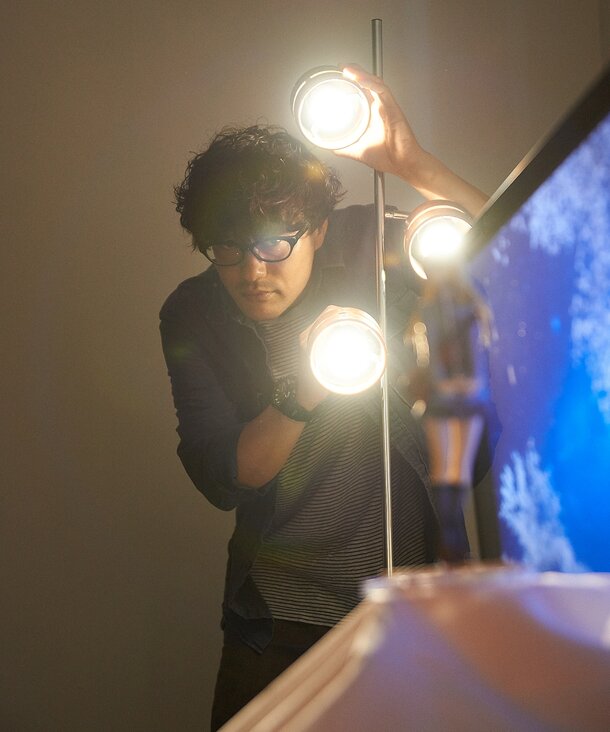
I brightened her face with the mirror...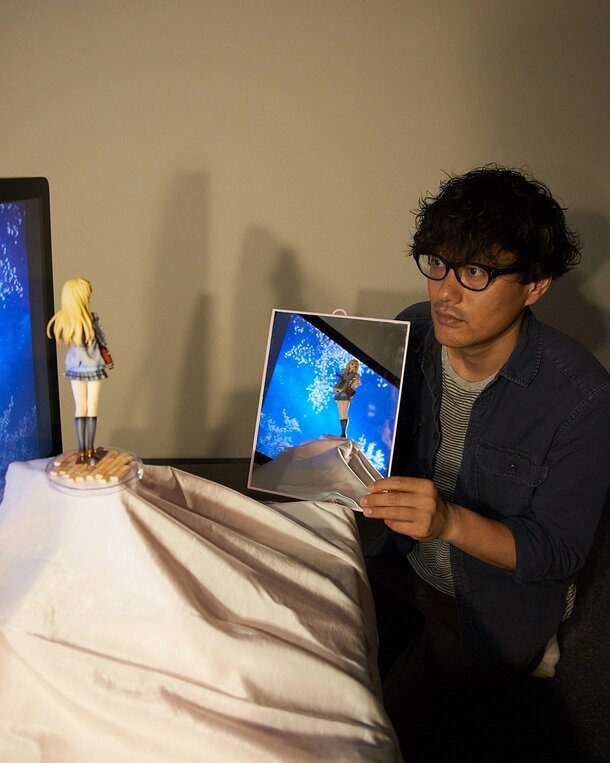
And the photoshoot begins! The most important thing is putting your heart into it when you press that button. It can really change the photo.
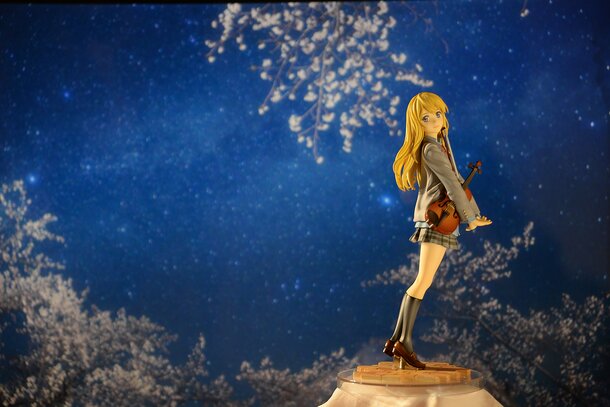
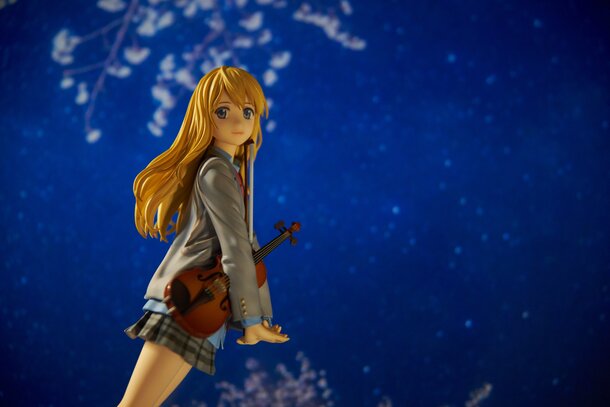
These 2 photos aren’t edited. Using editing software, I tried to bring out Kao-chan’s sweet side.
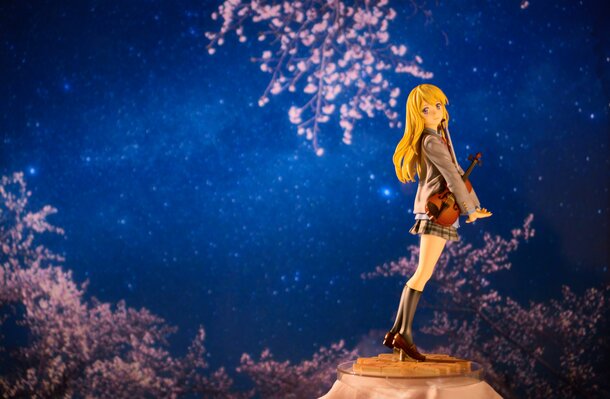
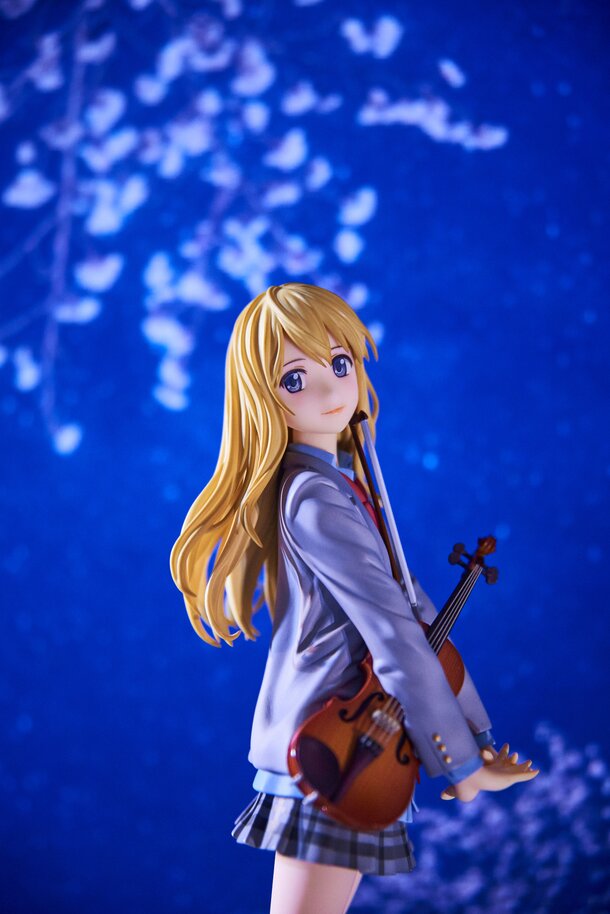
5. Tried some iPhone Photography, Too
Like I said before, any camera works, so I tried taking photos with an iPhone, too.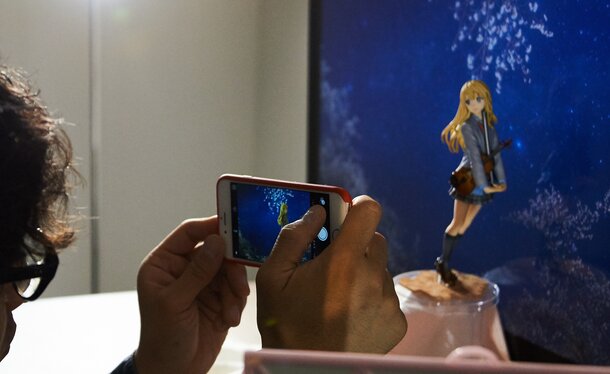
This is an iPhone photo. It has an incredible camera!!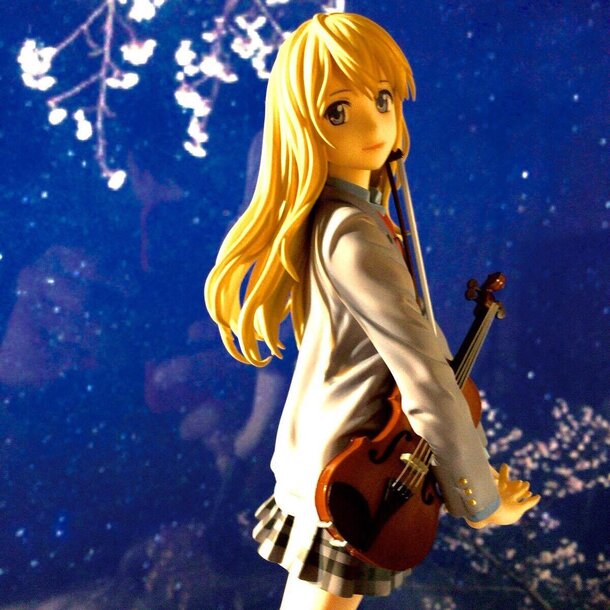
6. Summary
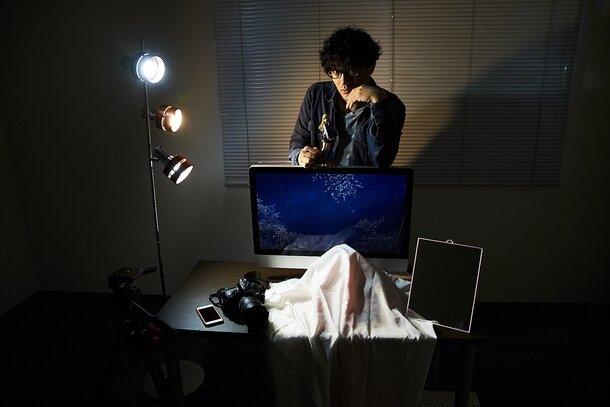
So, what’d you think? Having been a professional photographer for 16 years, I’ve heard how difficult it is many times. I always say, though, that all you need to do is think to yourself, ‘It’s not hard!’ and ‘I want to take pictures!’. You don’t need special equipment, either, and you don’t have to use difficult techniques. You just photograph based on what you see and how you feel.
I hope someone out there reads this and things, ‘I might try taking some photos’!
See you again soon!

 Shopping Guide


![[Tutorial] How to Take Figure Photography Like a Pro](https://resize.cdn.otakumode.com/ex/30.19/u/6cdde1a1830e45f4a561bbb3f4ff1b69.jpg)
![[Tutorial] How to Take Figure Photography Like a Pro 1](https://resize.cdn.otakumode.com/ex/30.15/u/779b732ac73a4c2c9323b77bf5c6ab15.jpg)
![[Tutorial] How to Take Figure Photography Like a Pro 2](https://resize.cdn.otakumode.com/ex/30.15/u/b5db4fe8d9354a86b376423d2bd4ddcf.jpg)
![[Tutorial] How to Take Figure Photography Like a Pro 3](https://resize.cdn.otakumode.com/ex/30.15/u/3f5518c6f5dc4c11b456462779c362b6.jpg)
![[Tutorial] How to Take Figure Photography Like a Pro 4](https://resize.cdn.otakumode.com/ex/30.15/u/9c9a70eb774d406399e4b01a19716e37.jpg)
![[Tutorial] How to Take Figure Photography Like a Pro 5](https://resize.cdn.otakumode.com/ex/30.15/u/08321dd661db45858d87767501b28991.jpg)
![[Tutorial] How to Take Figure Photography Like a Pro 6](https://resize.cdn.otakumode.com/ex/30.15/u/e3dbbb2639914256a6de064ce1844c48.jpg)
![[Tutorial] How to Take Figure Photography Like a Pro 7](https://resize.cdn.otakumode.com/ex/30.15/u/ef63ebaa54854630955703910c04dc41.jpg)
![[Tutorial] How to Take Figure Photography Like a Pro 8](https://resize.cdn.otakumode.com/ex/30.15/u/cf803d49264d459c879f69841d2df87f.jpg)
![[Tutorial] How to Take Figure Photography Like a Pro 9](https://resize.cdn.otakumode.com/ex/30.15/u/a7e2ab1f42eb42c8bf9d1c2390419486.jpg)
![[Tutorial] How to Take Figure Photography Like a Pro 10](https://resize.cdn.otakumode.com/ex/30.15/u/a74ea515e2b14225933b52a1b7771d2b.jpg)
![[Tutorial] How to Take Figure Photography Like a Pro 11](https://resize.cdn.otakumode.com/ex/30.15/u/bcf49278712c478b878d59b47ad1ab8c.jpg)
![[Tutorial] How to Take Figure Photography Like a Pro 12](https://resize.cdn.otakumode.com/ex/30.15/u/35aa1f34423745cc81b9d323d6e86f71.jpg)
![[Tutorial] How to Take Figure Photography Like a Pro 13](https://resize.cdn.otakumode.com/ex/30.15/u/521861ac70cf443497efae899fcc366e.jpg)
![[Tutorial] How to Take Figure Photography Like a Pro 14](https://resize.cdn.otakumode.com/ex/30.15/u/b2975d5ff5c446ad87be9dccf0e74307.jpg)
![[Tutorial] How to Take Figure Photography Like a Pro 15](https://resize.cdn.otakumode.com/ex/30.15/u/b718c486ce114acca94c4b1e427d3b32.jpg)
![[Tutorial] How to Take Figure Photography Like a Pro 16](https://resize.cdn.otakumode.com/ex/30.15/u/6af5860f118a4c8c87d608a24b10ba95.jpg)
![[Tutorial] How to Take Figure Photography Like a Pro 17](https://resize.cdn.otakumode.com/ex/30.15/u/d96456cc822c4e868ef61026d90e8940.jpg)
![[Tutorial] How to Take Figure Photography Like a Pro 18](https://resize.cdn.otakumode.com/ex/30.15/u/402d47b4a41f465098e8bcbcc860e867.jpg)
![[Tutorial] How to Take Figure Photography Like a Pro 19](https://resize.cdn.otakumode.com/ex/30.15/u/02320833960445748a2c7c80bad3a300.jpg)
![[Tutorial] How to Take Figure Photography Like a Pro 20](https://resize.cdn.otakumode.com/ex/30.15/u/8a8d5526a6514f2c9907b58d1b489852.jpg)
![[Tutorial] How to Take Figure Photography Like a Pro 21](https://resize.cdn.otakumode.com/ex/30.15/u/719197b763a24e448e41b06e6737d146.jpg)
![[Tutorial] How to Take Figure Photography Like a Pro 22](https://resize.cdn.otakumode.com/ex/30.15/u/e701268ab70f41a7981293b5fb23f8da.jpg)
![[Tutorial] How to Take Figure Photography Like a Pro 23](https://resize.cdn.otakumode.com/ex/30.15/u/b7c54f2d3ef44e24a32aa68da787dfbe.jpg)
![[Tutorial] How to Take Figure Photography Like a Pro 24](https://resize.cdn.otakumode.com/ex/30.15/u/7514dc633e544d1dafdec87c9ca1d411.jpg)
![[Tutorial] How to Take Figure Photography Like a Pro 25](https://resize.cdn.otakumode.com/ex/30.15/u/f1aac158dda548f09c169e1e9601cca8.jpg)
![[Tutorial] How to Take Figure Photography Like a Pro 26](https://resize.cdn.otakumode.com/ex/30.15/u/2a9f5f09bba544909cbb1e7cb11e394c.jpg)
![[Tutorial] How to Take Figure Photography Like a Pro 27](https://resize.cdn.otakumode.com/ex/30.15/u/d27ef9949e7f44e484eac2d6cf6ff9aa.jpg)
![[Tutorial] How to Take Figure Photography Like a Pro 28](https://resize.cdn.otakumode.com/ex/30.15/u/ae41f8ebea1b45c38e70c876b90b5bc2.jpg)
![[Tutorial] How to Take Figure Photography Like a Pro 29](https://resize.cdn.otakumode.com/ex/30.15/u/ad962414b1cb4d539f05893873b44786.jpg)
![[Tutorial] How to Take Figure Photography Like a Pro 30](https://resize.cdn.otakumode.com/ex/30.15/u/5b553c2f98a24868a5c93e0bbfdd7f04.jpg)
![[Tutorial] How to Take Figure Photography Like a Pro 31](https://resize.cdn.otakumode.com/ex/30.15/u/21534dfd01164a0a918f61e1b34ee8cd.jpg)
![[Tutorial] How to Take Figure Photography Like a Pro 32](https://resize.cdn.otakumode.com/ex/30.15/u/d53a5298664c417985a4b970b50f0775.jpg)
![[Tutorial] How to Take Figure Photography Like a Pro 33](https://resize.cdn.otakumode.com/ex/30.15/u/f3fabe9a4525499e82a200fb6e94807d.jpg)
![[Tutorial] How to Take Figure Photography Like a Pro 34](https://resize.cdn.otakumode.com/ex/30.15/u/1d937c0647b345a6bf680ac8ccf2dbcc.jpg)
![[Tutorial] How to Take Figure Photography Like a Pro 35](https://resize.cdn.otakumode.com/ex/30.15/u/49dfdaef75a04bd8bc38a720dd3c362f.jpg)
![[Tutorial] How to Take Figure Photography Like a Pro 36](https://resize.cdn.otakumode.com/ex/30.15/u/f437ef4a761b49d3abf186c6865c4c81.jpg)
![[Tutorial] How to Take Figure Photography Like a Pro 37](https://resize.cdn.otakumode.com/ex/30.15/u/dfbc36ad14964dc79970ba6f85336065.jpg)
![[Tutorial] How to Take Figure Photography Like a Pro 38](https://resize.cdn.otakumode.com/ex/30.15/u/e435798e5cf64d6688cbf8f88fc2dbe3.jpg)
![[Tutorial] How to Take Figure Photography Like a Pro 39](https://resize.cdn.otakumode.com/ex/30.15/u/1e499e3701ef419cb78bd782dcc73c19.jpg)
![[Tutorial] How to Take Figure Photography Like a Pro 40](https://resize.cdn.otakumode.com/ex/30.15/u/4986bee0d9234eacba27beb8cf6e5b86.jpg)
![[Tutorial] How to Take Figure Photography Like a Pro 41](https://resize.cdn.otakumode.com/ex/30.15/u/7d477aef2f514543a70b48b1f1cd5681.jpg)
![[Tutorial] How to Take Figure Photography Like a Pro 42](https://resize.cdn.otakumode.com/ex/30.15/u/ccea6f1ff084478081eaabac2c672d32.jpg)
![[Tutorial] How to Take Figure Photography Like a Pro 43](https://resize.cdn.otakumode.com/ex/30.15/u/deceb8332cf84283a2696c07a4d3acd1.jpg)
![[Tutorial] How to Take Figure Photography Like a Pro 44](https://resize.cdn.otakumode.com/ex/30.15/u/a4eb3fc37663423290c27b3ea55748a2.jpg)
![[Tutorial] How to Take Figure Photography Like a Pro 45](https://resize.cdn.otakumode.com/ex/30.15/u/761119212f7a4d049c11da1bef80680e.jpg)
![[Tutorial] How to Take Figure Photography Like a Pro 46](https://resize.cdn.otakumode.com/ex/30.15/u/021be9a80af94079a968d8eeeac7ed41.jpg)
![[Tutorial] How to Take Figure Photography Like a Pro 47](https://resize.cdn.otakumode.com/ex/30.15/u/d13a90086e314413aafdd77c4e4c28c8.jpg)
![[Tutorial] How to Take Figure Photography Like a Pro 48](https://resize.cdn.otakumode.com/ex/30.15/u/9c5d83ae1f3747d28f6b624ab10df941.jpg)
![[Tutorial] How to Take Figure Photography Like a Pro 49](https://resize.cdn.otakumode.com/ex/30.15/u/30beef2056a141d2833397bafdbae5dc.jpg)
![[Tutorial] How to Take Figure Photography Like a Pro 50](https://resize.cdn.otakumode.com/ex/30.15/u/92c05a04d5114e82bea5f2cc3a89b42b.jpg)
![[Tutorial] How to Take Figure Photography Like a Pro 51](https://resize.cdn.otakumode.com/ex/30.15/u/11a31a231d6341ddabf79b72f6d3a5a7.jpg)