 Shopping Guide


)
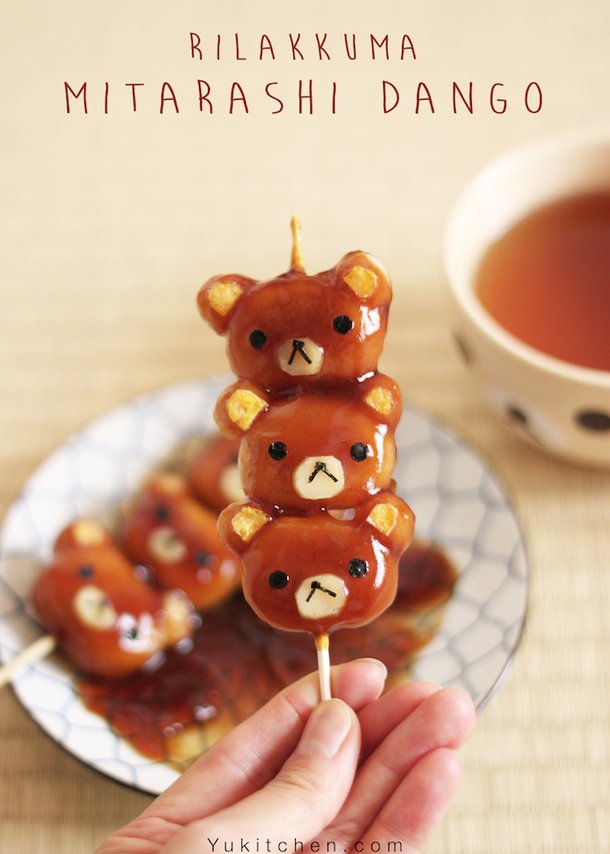
![[Healthy Food for the Geeky Soul] Rilakkuma Mitarashi Dango](https://resize.cdn.otakumode.com/ex/30.19/u/235f64ff5d1f4718afa6388a983f5378.jpg)
I’ve been seeing this super cute Rilakkuma Dango stuff all over the internet, so I decided to follow the virtual trend =)
Mitarashi dango is a type of dango (mochi) skewered onto sticks in groups of 3–5 (traditionally 5) and covered with a sweet soy sauce glaze. It’s SO GOOD! This is hands down my favorite Japanese comfort food.
This dango is easily found in Japanese markets or convenience stores. But did you know that you can actually make it pretty easily at home? And when I see chewy brown food, I always think of Rilakkuma. So I decided to put life into the dango by adding ears and faces, to create the cutest dango bears!
This extremely-cute dango is super-delicious! Store-bought ones are tasty too, but nothing beats the home-made goodness!

Mitarashi Rilakkuma Dango summery:
・Rilakkuma’s ears: Eggs
・Rilakkuma’s eyes, nose and month: Nori (dried seaweed)
・Rilakkuma’s white mouth part: Cheese
INGREDIENTS
For the Dango:
・50g Joshinko flour (Rice flour)
・50g Shiratamako flour (Glutinous Rice flour)
・75g Water
For the Mitarashi sauce:
・2 tbsp Soy sauce
・5 tbsp Mirin
・4 tbsp Brown sugar
・4 tbsp Water
・1 tbsp Potato starch (with 1 tbsp water later)
For the Rilakkuma's face
・1 piece Nori (dried seaweed)
・1 egg
・2 thinly sliced cheese (I picked gouda cheese)
Instructions
1:Prepare the Mitarashi Sauce!
Put all the Mitarashi ingredients in a saucepan except for the potato starch.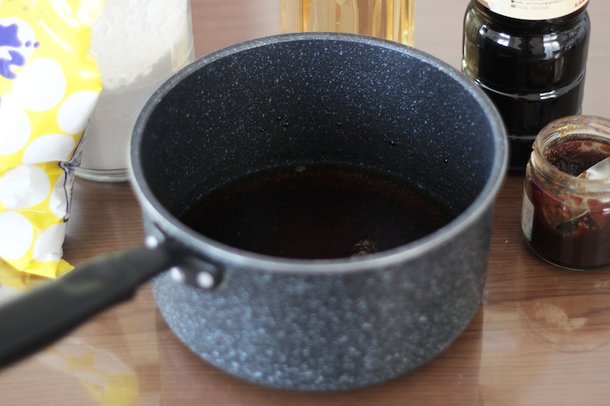
2: Boil.
Set the heat to medium-high and bring it to a boil. This will help in getting rid of all the alcohol from the mirin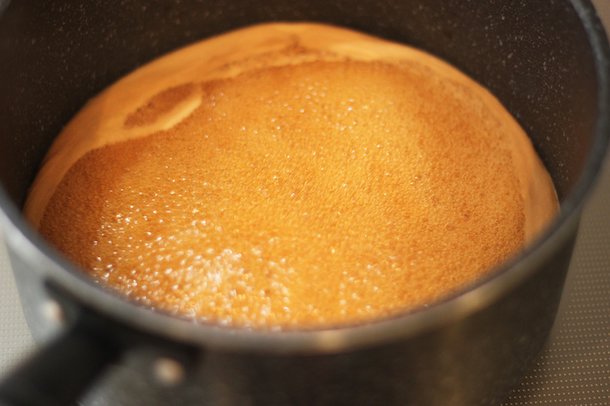
3: Make potato starch mixture and add it to the pan
Potato starch is the key ingredient in making sure your sauce is thick and shiny! Make sure your potato starch is mixed well with 1 tbsp water before adding it to the main saucepan. If it’s not mixed well your mitarashi-sauce won’t look pretty, so make sure that it is well mixed.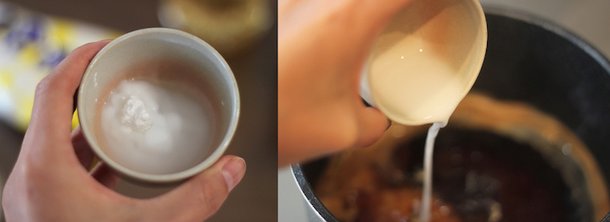
4: Keep mixing!
keep stirring the sauce until it has all combined. After the sauce has thickened (you should be able to draw a line in the pan like in the picture), turn off the heat and let it rest until the dango is ready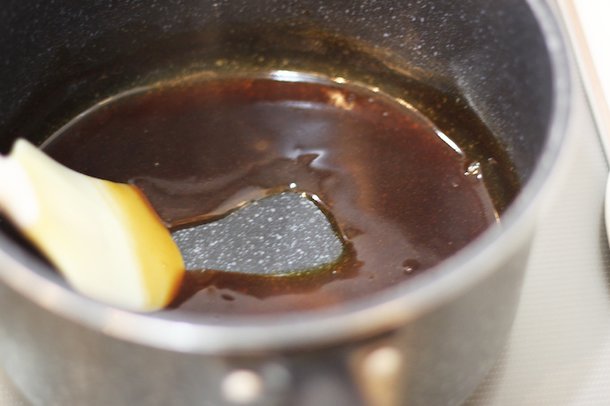
5:Making Dango! Mix all the ingredients.
Mix the dango ingredients and knead with your hand until the dough becomes smooth. If the mixture is too dry, add a little water till the dough is just right. (When it’s too dry, it’s difficult to stick ears and limbs together.)
A little advice: try to make the consistency of the dough match that of you earlobes!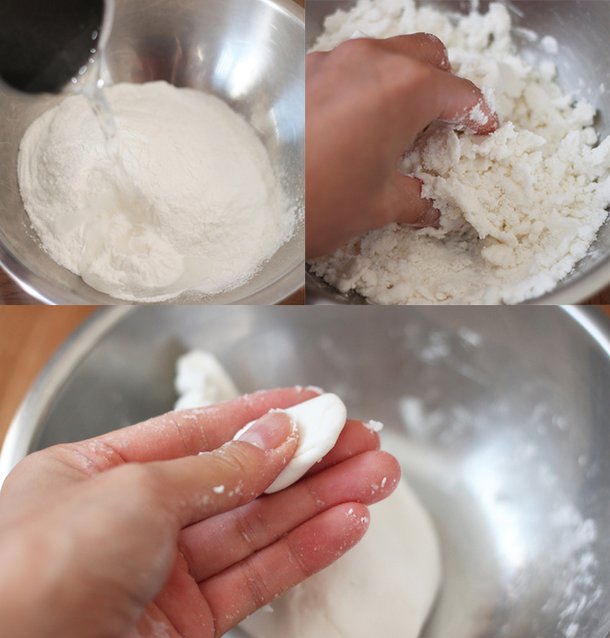
6:Make Rilakkuma shaped dango.
When attaching ears to the face, make sure the dough is sticky enough to stick together, otherwise they might fall apart when boiling. No one likes earless Rilakkuma!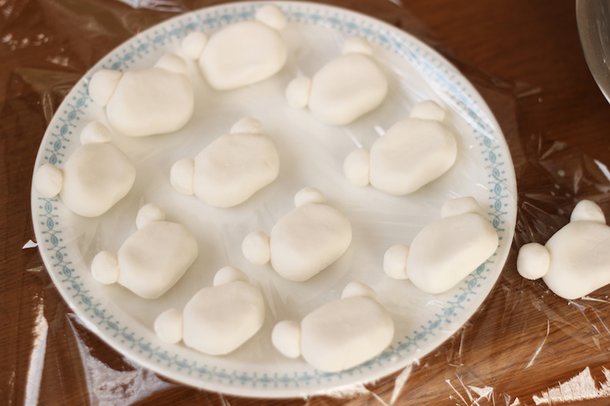
7: Boil them all!
Place the dangos carefully in water boiling at a low temperature and let them cook until they float to the surface. (Be super gentle when you pick up the dangos. I often did it incorrectly and broke them when I tried. It was really sad, so please be careful!) It should take around 10 minutes. When dangos start to float, that means they are ready to be picked up!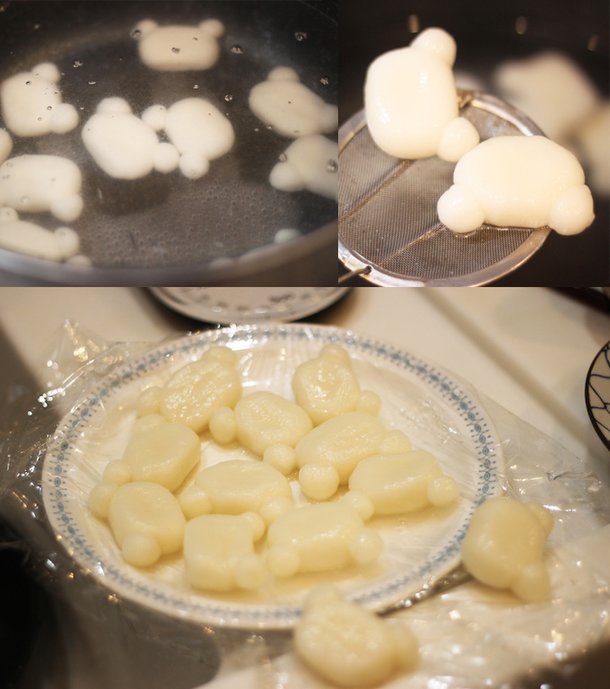
8: Stick the dangos into skewers.
You will feel awkward to skewer the Rilakkumas, but you gotta do what you gotta do here. Make sure you stick it right in middle of the bears!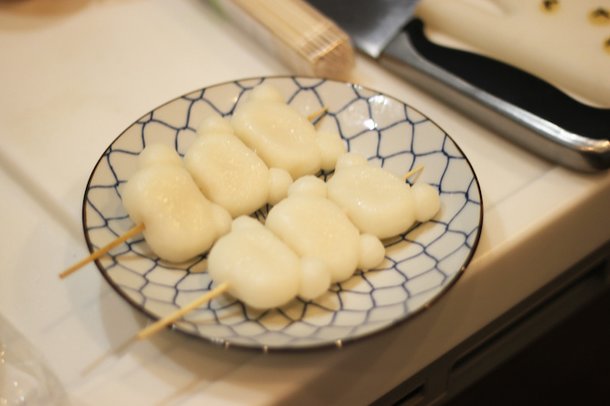
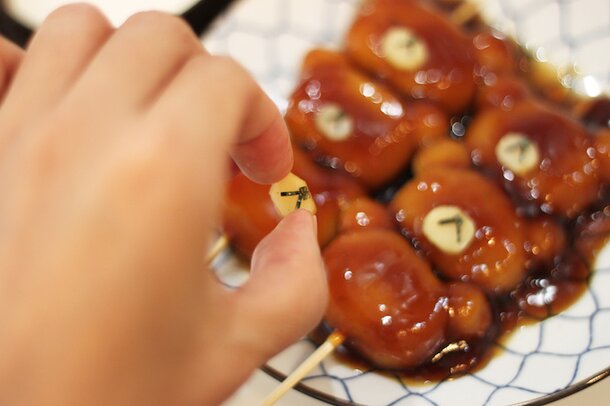
9: Make the facial parts!
For the ears, make a thin omulet and cut some small semicircles to look like Rilakkuma’s ears.
For Rilakkuma’s mouth, cut some thin slices of your favorite cheese. I picked gouda cheese! Then cut some ellipse shapes using a small knife.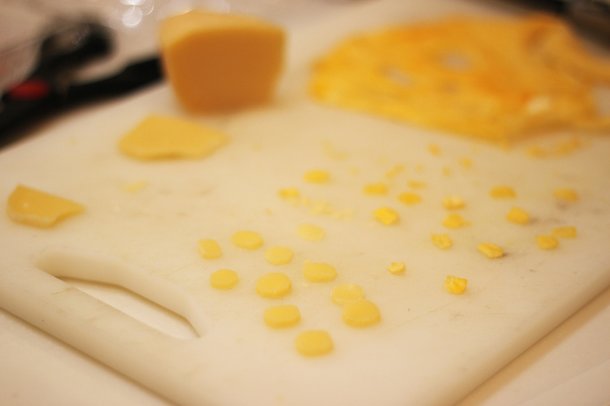
For Rilakkuma’s lips, it’s better to use cut nori (dried seaweed). It saves a lot of time but if you don’t have it, you can simply use your scissors!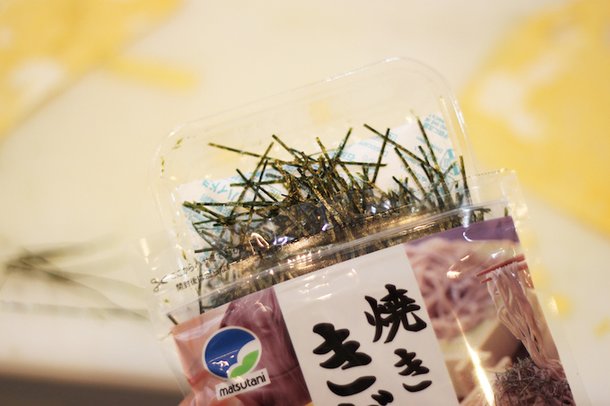
10: Pour the first Mitarashi sauce.
I pour the sauce with a spoon, but I recommend using a brush if you have it. This is what your Rilakkuma Dango looks like with the single layered Mitarashi sauce. If you like this color, you can finish here. I personally like it a bit darker, so I did a double layered.
By the way, put on the facial parts AFTER the Mitarashi sause!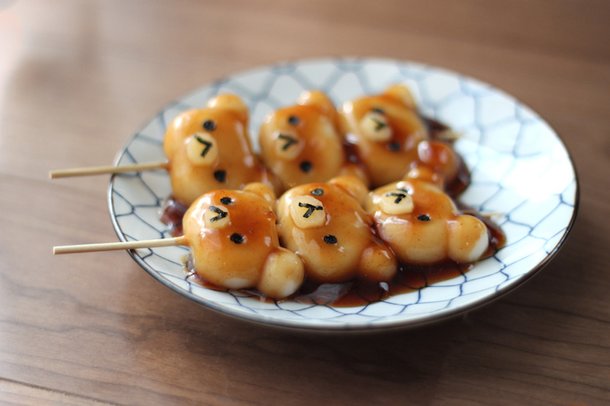
11: Pour the second Mitarashi sauce.
Leave the dango for 10 min after the first layer, then pour the second layer of Mitarashi sauce on top and place the facial parts next. This should make your dango look much browner, then your Rilakkuma Dango is finally ready!
This was my first time making Mitarashi, and I have to say it was so much easier than I thought! I’m going to make this every week now for a good snack 
Mitarashi dango with the shape of Rilakkuma face might melt your heart before even tasting it, like it did to me.
My mother had this cutest Korilakkuma tea cup. Of course I had to pour some Japanese tea in it to go with my dango.
This chewy and delicious dango is your must try next time you feel like cooking!!
Enjoy creating! =)
This recipe was adapted with permission from Yukitchen.com
You can learn more about Yuki and her awesome creations at her website, or follow her on Instagram!